Sour Dough
Feel like barbecuing but it's not dinner time? Why not bake some sour dough bread for breakfast or lunch?
Barbecues are not just great ways to cook meat and vegetables they can be used for baking also. I decided to try out a simple sour dough loaf with my charcoal barbecue to see how it turned out.
What is Sour Dough?
The name "sour" comes from the vinegary aroma of the sour dough starter which is basically a yeast colony. Many breads use yeast to rise the dough allowing air into the loaf and making the end result less dense. Some recipes require a step to activate the yeast by hydrating it and possibly feeding it some flour or sugar. For sour dough, however, the yeast is already active.
To make sour dough bread you need to prepare a yeast starter. This can be done by waiting for wild yeast strains to land in a mixture of flour and water and takes about a week to get going. An easier way is to ask someone who has one to give you some of their starter or find a friendly bakery that is willing to share. The sour dough starter is a collection of living yeast cells and needs food and water to survive.
Feeding
Treat it like a pet. A sour dough starter needs to be fed daily if it is kept at room temperature. That's easy to do. Measure an equal amount of the sour dough starter, flour and water and give it a mix around. So 50g or sour dough starter needs 50g of flour and 50g water (about 50ml) each day.
You can leave the sour dough starter in the fridge to slow down how fast it grows and eats the food. If left in the fridge you will only have to feed it about once per week to keep it healthy. It can survive a little longer but there will be some die-off of yeast cells if left too long, after which it may take a day or so to get back to a full health before being ready for baking. Take it out of the fridge and feed it a few hours before you are ready to prepare the bread dough.
Dough Preparation
The basic ingredients:
- Strong flour
- Water
- Sour dough starter
- Salt
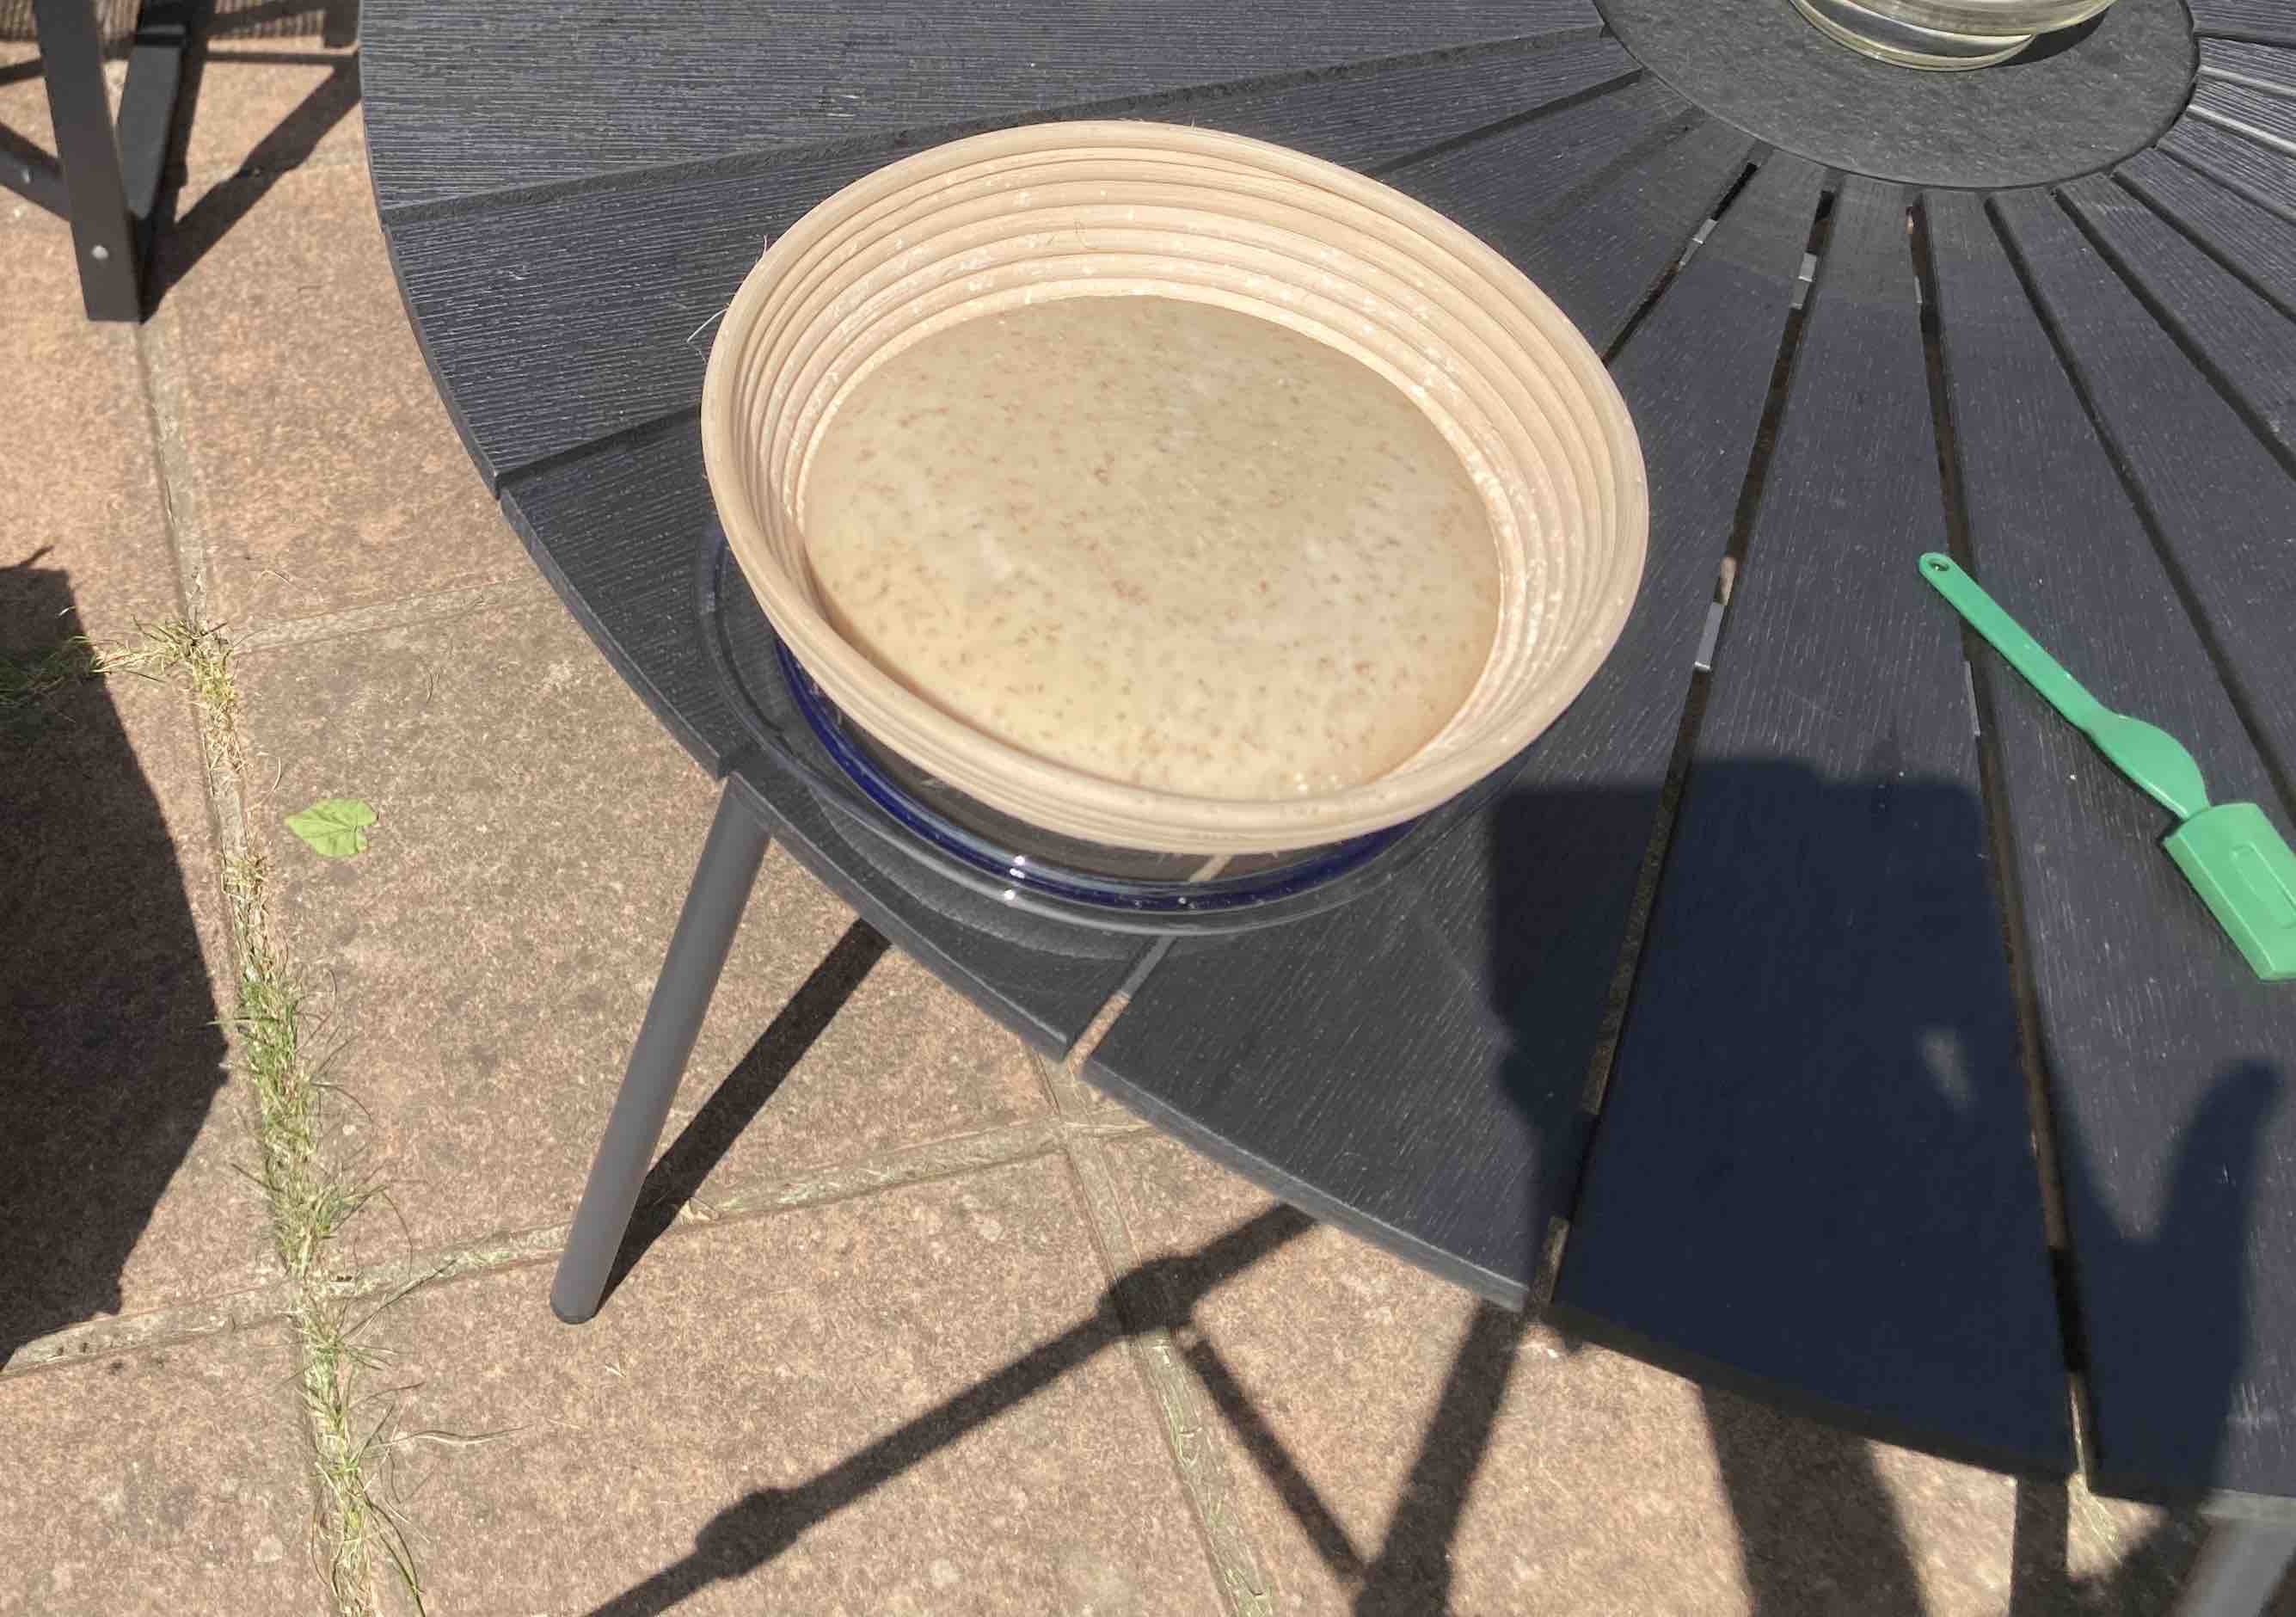
The main work is to knead the dough for a decent amount of time once all the ingredients are mixed. Don't leave out the salt as it gives the bread a nice amount of flavour. Let it rise for a few hours before knocking it back and shaping it. A Banneton is a basket that can be used to let the bread rise out and up, but you can achieve this with any bowl and a clean tea-towel. Everything you need to know is in this video.
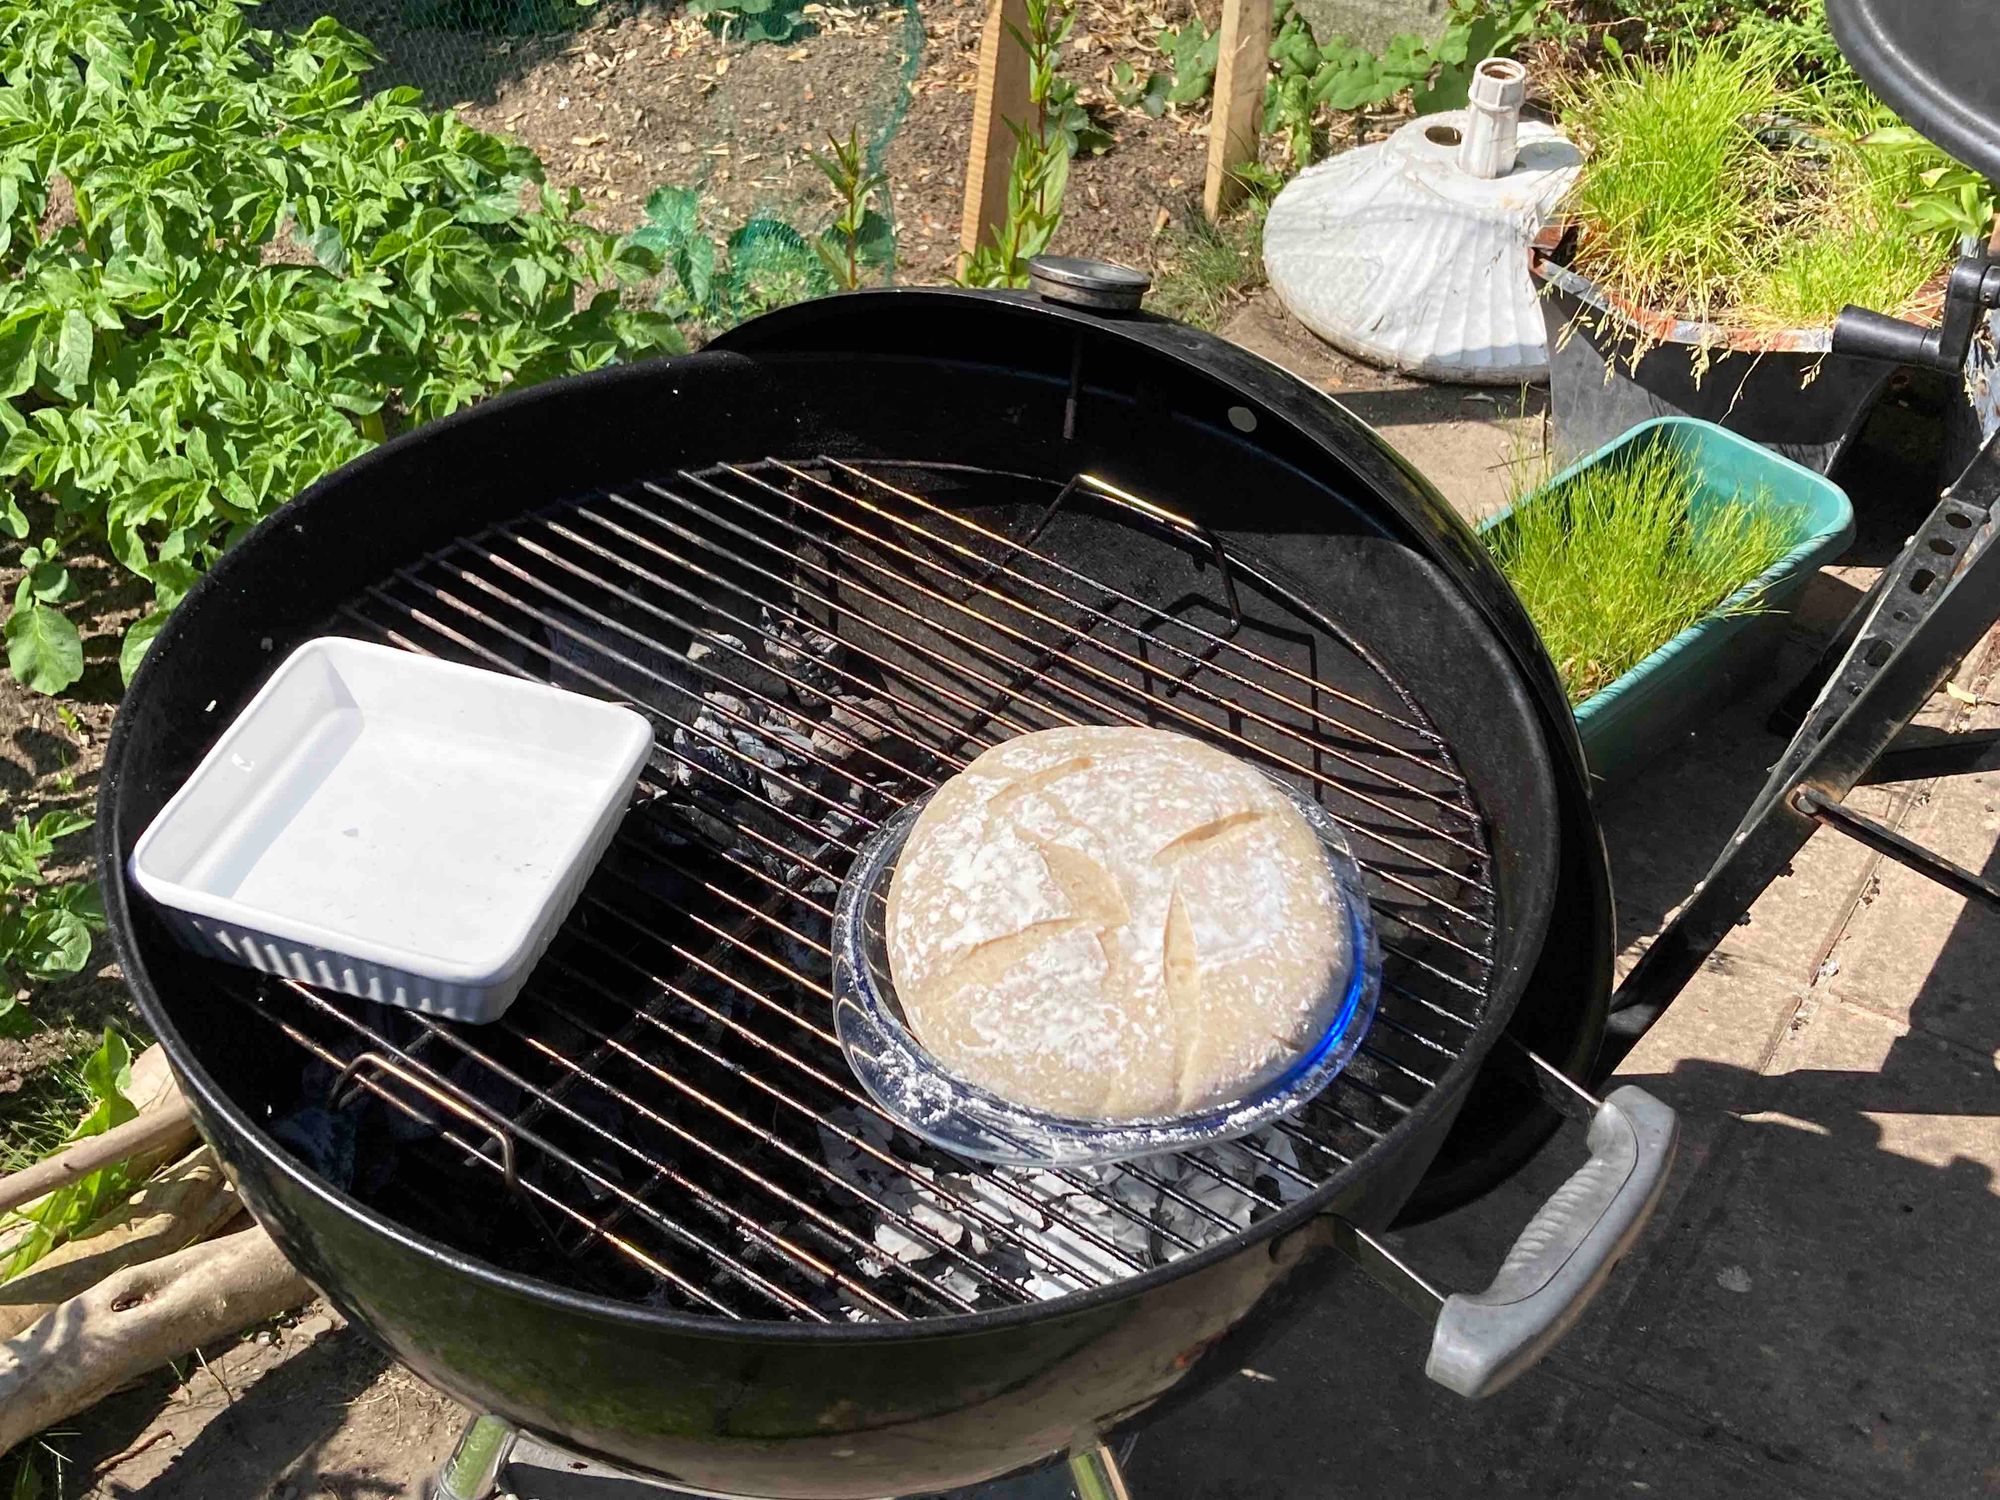
Barbecue Time
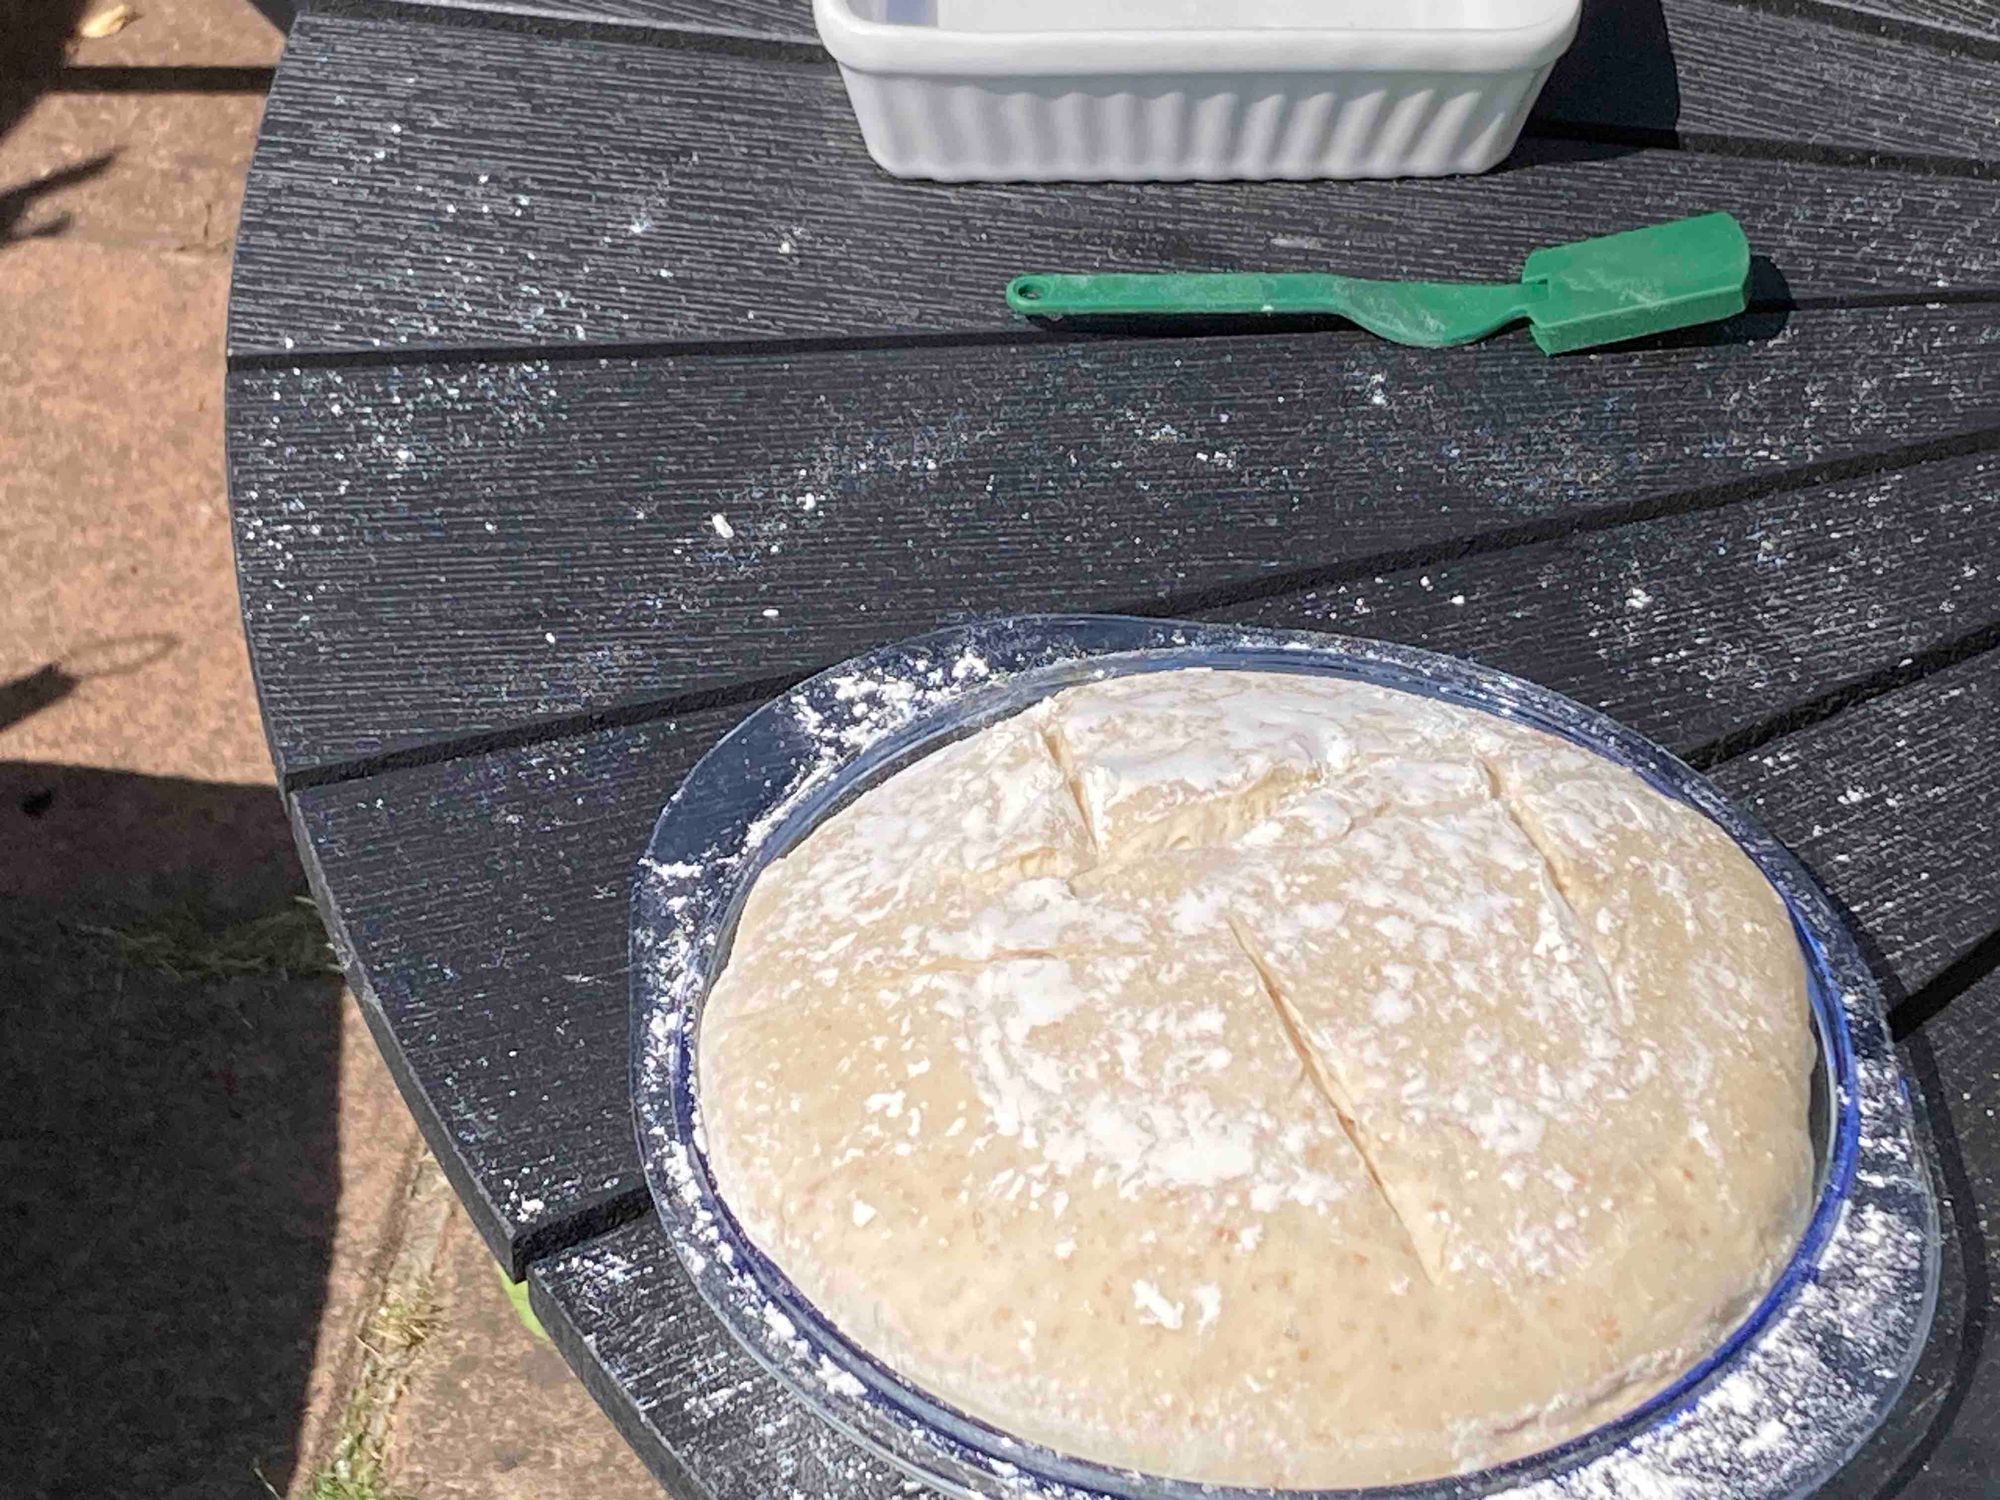
There is nothing fancy about the barbecue setup; as usual I set things up for indirect heating with the bread on the opposite side from the charcoal. I aimed to get the internal temperature at around 200˚C. Turn out the dough onto a solid baking tray having dusted with plenty of flour. You can use a baking sheet if available but make sure to cut the edges off in case they poke over the flames and catch fire. Use a razor or extremely sharp knife to leave a baker's mark on the top of the bread.
Sour dough bread has a crisp outer crust, but you can soften this by increasing the moisture in the oven or barbecue. I placed a small, oven-safe tray of hot water inside just over the coals to provide plenty of steam inside once the cover of the barbecue was in place. I left the water there for about twenty minutes.
I turned the dough a few times to try to get it evenly baked even though that made it more difficult to keep the temperature at an even level.
When baking sour dough in a conventional over, I've found that cooking time can vary quite a bit, especially when I've left the dough to rise slowly overnight in the fridge. On these occasions it takes a few extra minutes for the bread to bake through fully. There are a couple of things to look our for so that you get the timing right.
The first is that you could use your instant read probe thermometer to measure the internal temperature. If it reads above 100˚C then you are done. Another sign is that the crust on top, bottom and sides should be roughly the same when tapped lightly. Just be careful when handling as it will be quite hot.
I found that baking on the barbecue was significantly slower than in a regular fan-assisted oven. What is usually about a thirty-five minute bake was closer to fifty minutes.
Results
The bread cooked evenly and tasted delicious. Not as smokey as I was expecting – next time I will add some pre-soaked wood chips to add a bit more of the aroma and taste.
The crust did not turn out as crunchy as in my conventional oven so I suspect there is a significant difference between my barbecue thermometer and the thermostat on the oven. Next time I will reduce the amount of time I have the steam inside the barbecue cover.
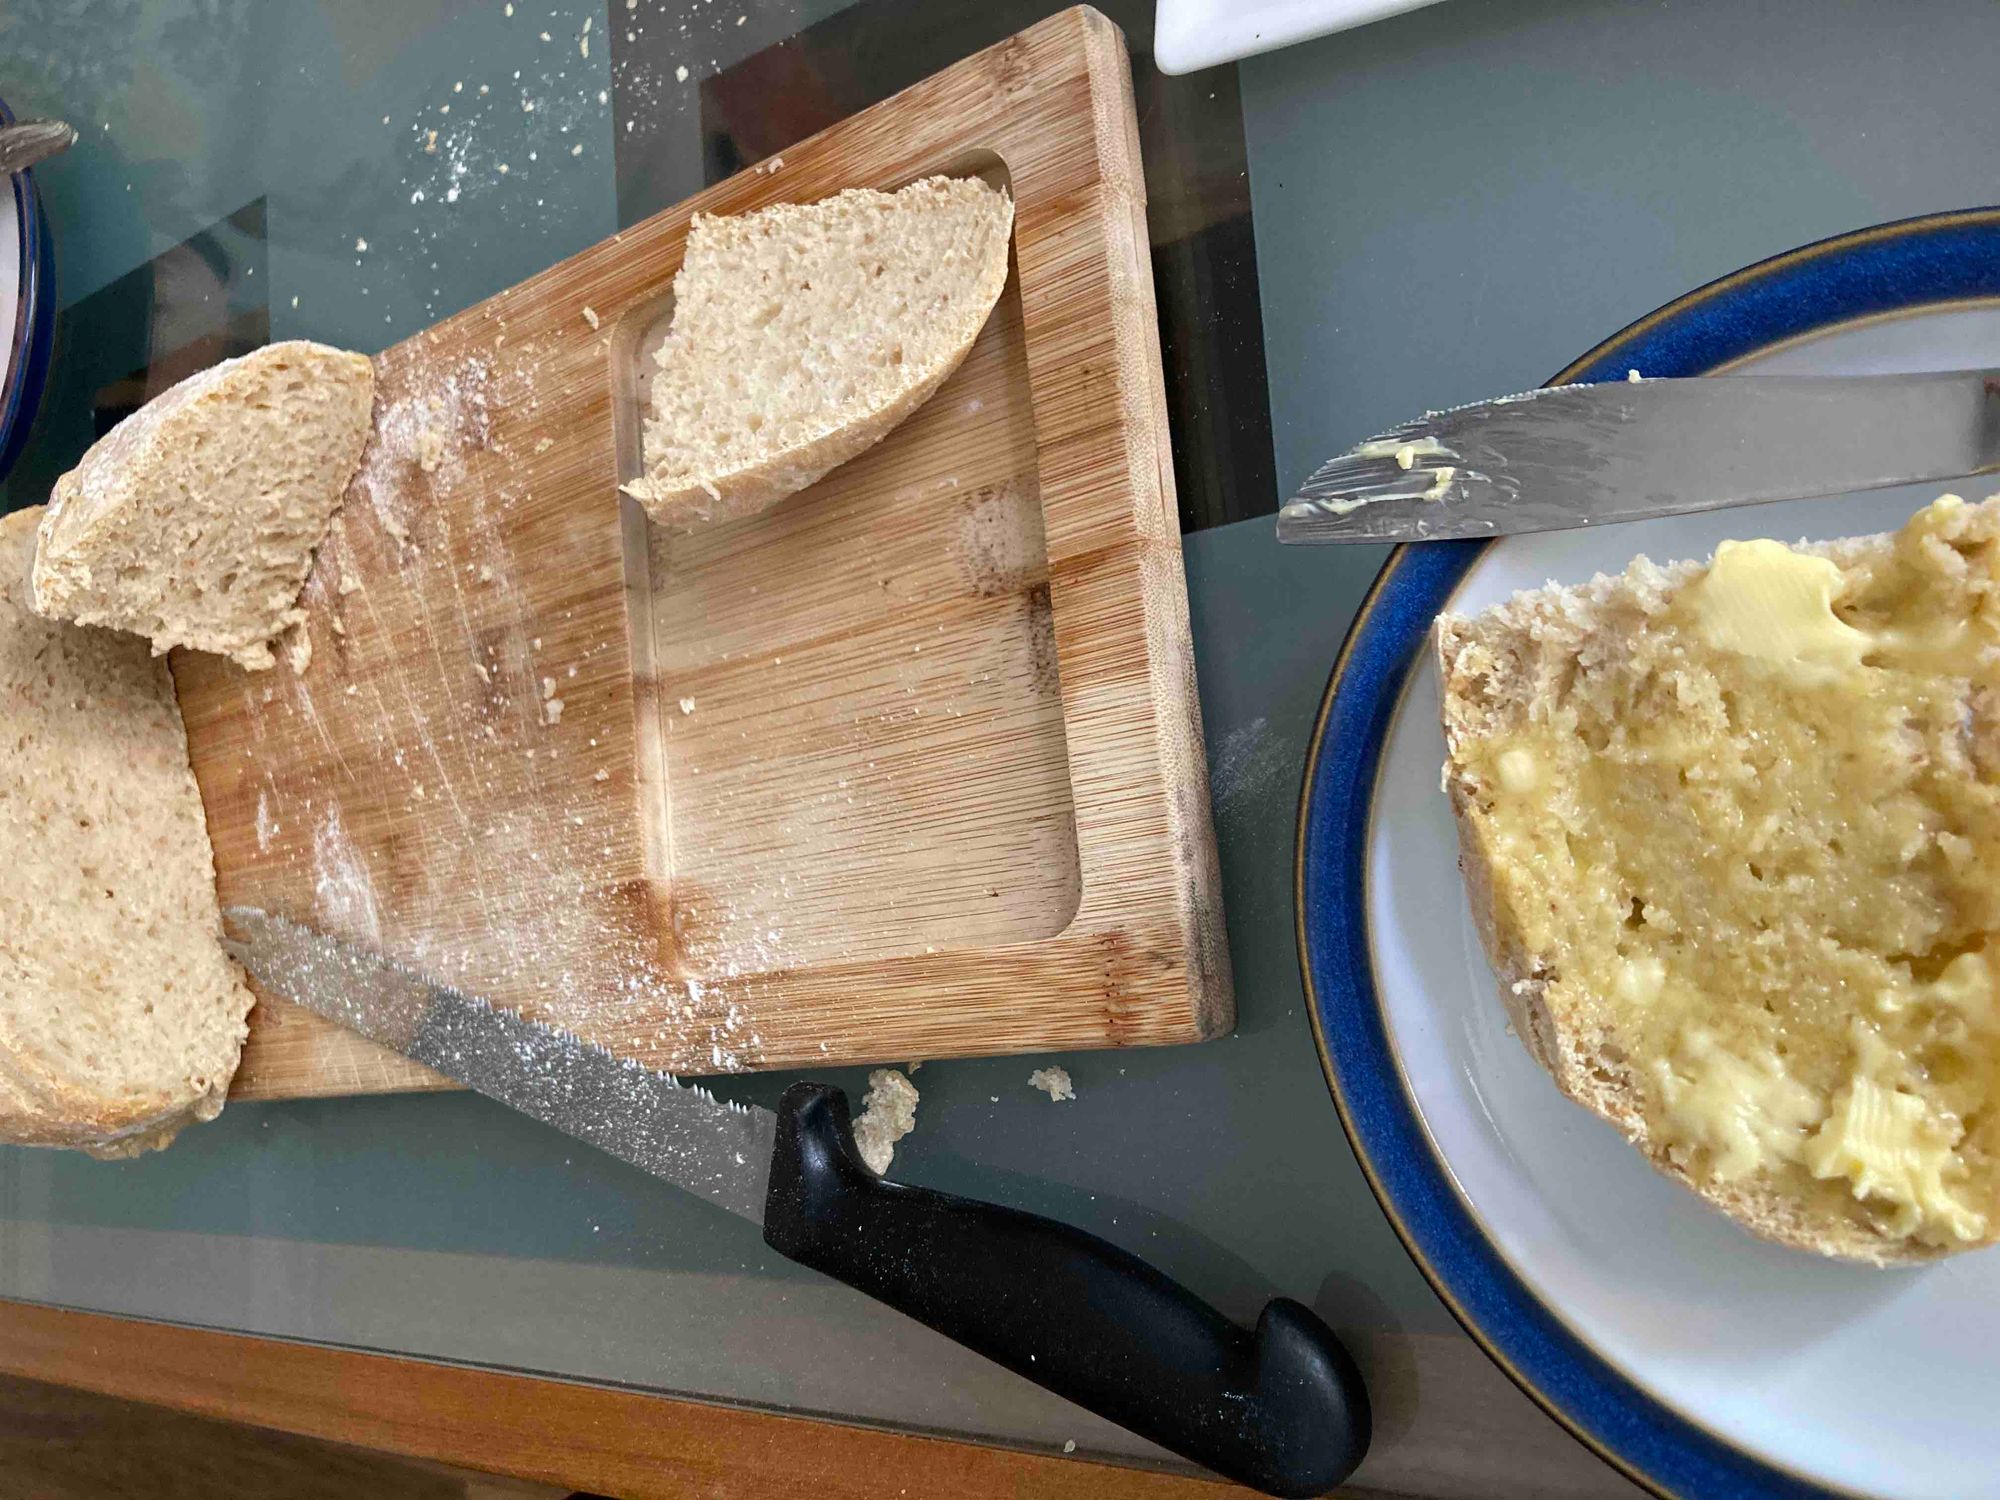
It tasted delicious after cooling a little with plenty of melted butter. Half the loaf was gone in minutes!